LPIC Level3の学習の一環で仮想CentOS v6.4にOpenLDAP 2.4系をインストールした際の手順を簡単に纏めておく。2.2系とは手順が少し異なったので、その点戸惑った。参考サイトは記事末尾に紹介。
インストール
事前に対象のOS環境に既にpkgが導入されているかどうかを確認する。
# yum list installed '*ldap*'
Loaded plugins: fastestmirror, refresh-packagekit, security
Loading mirror speeds from cached hostfile
 * base: centos.ustc.edu.cn
 * extras: mirror.neu.edu.cn
 * updates: centos.ustc.edu.cn
Installed Packages
apr-util-ldap.x86_64                     1.3.9-3.el6_0.1                        @anaconda-CentOS-201207061011.x86_64/6.3
openldap.x86_64                          2.4.23-32.el6_4.1                      @updates
OSの初期インストール時に幾つか入っていたようだが、肝心のservers, clientsが入っていないので下記コマンドでインストールする。
# yum install openldap-servers
# yum install openldap-clients
初期設定 – slapd.conf
LDAP機能の提供サーバである、slapdの設定ファイルのひな形をコピーし、それを編集する。
# cp /usr/share/openldap-servers/slapd.conf.obsolete /etc/openldap/slapd.conf
ここで編集するのは下記の3要素。
- suffix : ディレクトリサービスの基点となるディレクトリ
- rootdn : LDAPディレクトリ管理者(ルートDN)
- rootpw : ルートDNのパスワード
尚、ルートDNのパスワードの設定はslappasswdコマンドを用いて暗号化したものを設定ファイルに入力する。
# slappasswd
New password:
Re-enter new password:
{SSHA}57xj01XKSrzMVdDC6tqyCe86itiSQosQ
また、設定の動的な更新を可能にするために、databaseディレクティブに対してconfigのモノも作成する。結果として修正後の設定ファイル(抜粋)は下記の通り。
database config
rootdn  "cn=admin,cn=config"
rootpw  {SSHA}57xj01XKSrzMVdDC6tqyCe86itiSQosQ
database  bdb
suffix    "dc=yukun,dc=info"
rootdn    "cn=Manager,dc=yukun,dc=info"
rootpw    {SSHA}57xj01XKSrzMVdDC6tqyCe86itiSQosQ
directory       /var/lib/ldap
ここでは、configとbdbのパスワードは一先ず同じモノとしている。
続いて、下記のコマンドで設定をテスト・反映する。
# rm -rf slapd.d
# mkdir slapd.d
# slaptest -f slapd.conf -F slapd.d
bdb_db_open: warning - no DB_CONFIG file found in directory /var/lib/ldap: (2).
Expect poor performance for suffix "dc=yukun,dc=info".
config file testing succeeded
データベースの管理パラメータの設定ひな形が管理ディレクトリに存在していなかったので、下記のコマンドでコピーする。
# cp /usr/share/openldap-servers/DB_CONFIG.example /var/lib/ldap/DB_CONFIG
再度チェック。
# slaptest -f slapd.conf -F slapd.d
config file testing succeeded
slapdの起動
yumからインストールした場合、serviceコマンドからslapdを起動できる。
# service slapd start
Checking configuration files for slapd:                    [FAILED]
ldif_read_file: Permission denied for "/etc/openldap/slapd.d/cn=config.ldif"
slaptest: bad configuration file!
Permissionがrootになっているので、ldapに直す。
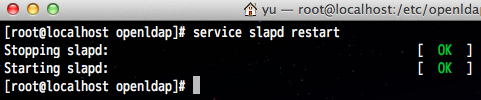
# chown -R ldap: /etc/openldap/slapd.d/
[root@localhost openldap]# service slapd start
Starting slapd:                                            [  OK  ]
あわせてサーバ起動時の自動起動設定も実施する。
chkconfig slapd on
後はldapadd, ldapsearchコマンド等が正常に使えればは問題なし。それについては後日纏めておく。
参考サイト
- OpenLDAP, Documentation
- Formation OpenLDAP – PedroWiki
- openLDAP 構築(38) – エラーメッセージ集 | arinux
- DebianでLDAPサーバ – Humanity
- Cannot setup LDAP via server guide – hangs when issuing "ldapmodify" command [Archive] – Ubuntu Forums
- Multiple issues with OpenLDAP slapd [Archive] – Ubuntu Forums
コメント
[…] >>Linux: OpenLDAPのインストール・初期設定(slapd.conf)・起動確認 Author: […]